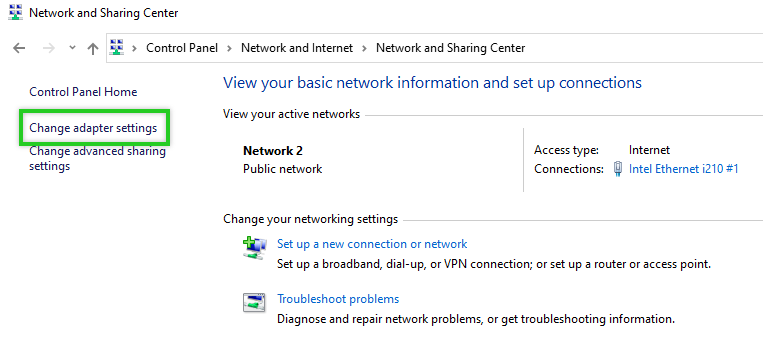
Open the Control Panel.
Click Network and Internet > Network and Sharing Center > Change Adapter Settings.
Right-click on the network adapter.

Click Properties.
Double-click Internet Protocol Version 6 (TCP / IPv6).
Enable the Use the following IPv6 address option.
In the IPv6 Address field, type the IPv6 address assigned to the server.
Click in the Subnet prefix length field. The subnet prefix length is then entered automatically.
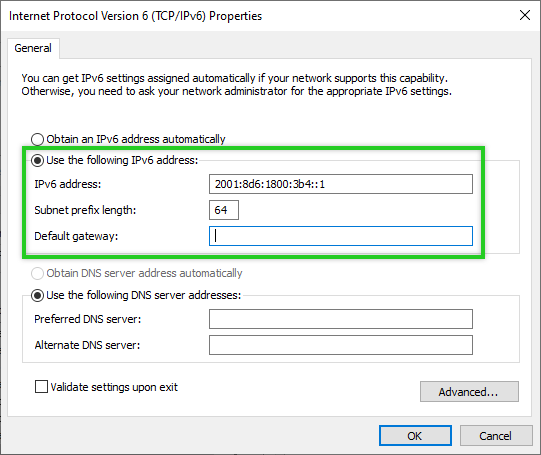
You may receive a warning that the gateway is in a different subnet. You can ignore this warning. In this case, simply confirm with YES that the configuration is to be saved.
If the server is not reachable via either the main IP address or the additional public IP address after the changeover, you can log in to the server using the KVM console to check the configuration.
Click Add.

In the IPv6 Address field, type the IPv6 address that is assigned to the server.
Click in the Subnet prefix length field. The subnet prefix length is then entered automatically.
Click Add.

Confirm the still open dialogues with OK.
