How to connect to your iSCSI Network Storage using Microsoft Windows, Server or HyperV
This guide helps you connect to your Rackzar-provided iSCSI storage using the built-in Microsoft iSCSI Initiator.
✅ Prerequisites:
- Windows 10/11 or Windows Server 2016 and newer.
- IP address of the iSCSI target (provided by Rackzar Support).
- Administrative privileges on your system.
1️⃣ Install the Microsoft iSCSI Initiator
The Microsoft iSCSI Initiator is already included in most modern Windows and Windows Server versions.
To check if it's available:
- Press Win + R, type
iscsicpl, and hit Enter.
- If the iSCSI Initiator opens, you're ready to go.
- If prompted to start the iSCSI Initiator Service, click Yes.
If not installed (rare cases on some Server Core versions):
- Go to Server Manager → Add roles and features → Features → Install Multipath I/O and ensure iSCSI Target Storage Provider is installed.
2️⃣ Connect to the iSCSI Target
- Open iSCSI Initiator (search for “iSCSI Initiator” in the Start Menu).
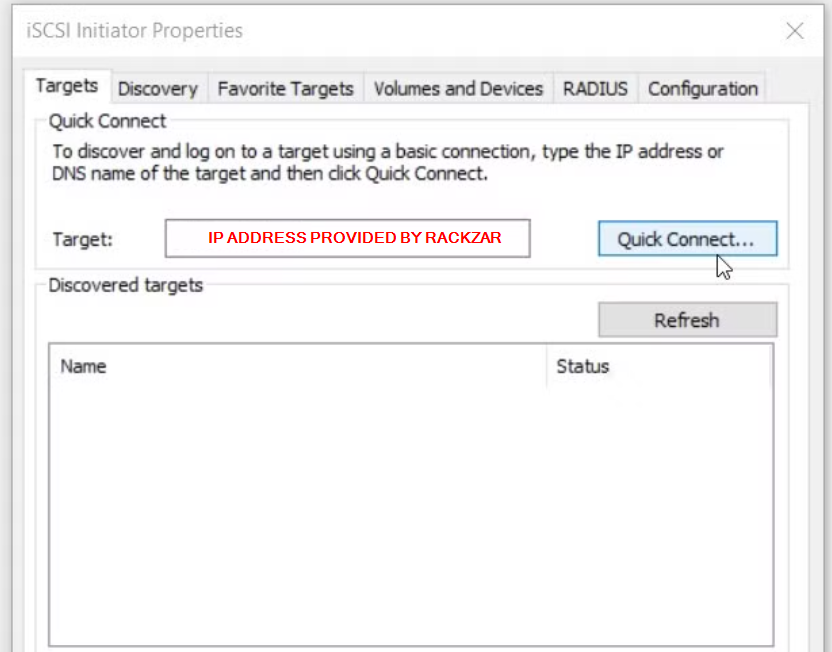
- Under the Targets tab, in the Target field, enter the IP address provided by Rackzar Support.
- Click Quick Connect….
- In the Discovered Targets list, your target should appear as Inactive or Connected.
- Select the target and click Connect.
- Optionally, check Enable multi-path if advised by support.
3️⃣ Configure the New Disk
- Open Disk Management (Press Win + X → Disk Management).
- You’ll be prompted to initialize the new disk.
- Choose GPT (recommended) or MBR based on your requirements.
- Create a New Simple Volume, assign a drive letter, and format the disk.
4️⃣ You're Done!
Your iSCSI storage is now ready to use just like any other local drive.
ℹ️ Notes:
- The IP address and authentication details (if required) are provided by Rackzar Support.
- For persistent connections (after reboot), ensure automatically restore this connection when the computer starts is checked when connecting.
- For advanced setups consult your Rackzar support representative.