How to install Proxmox on Your Dedicated Server
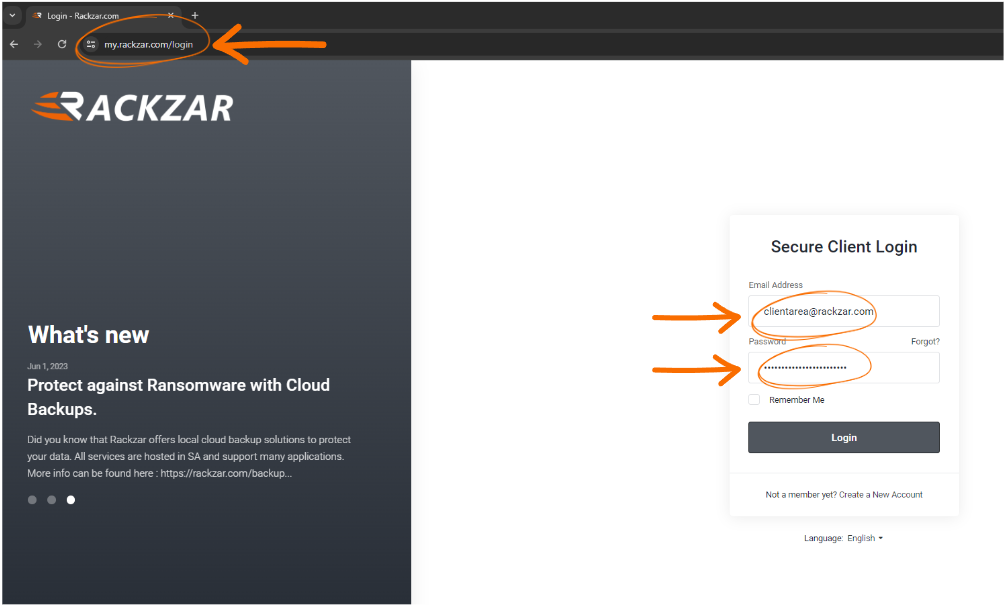
Step 1: Open Your Web Browser and Navigate to the Client Area URL
To access the client area, follow these steps:
- Launch your preferred web browser.
- In the address bar, type or copy-paste the following URL: https://my.rackzar.com/login
- Press "Enter" or "Return" on your keyboard to load the webpage.
You should now be directed to the login page of the client area.
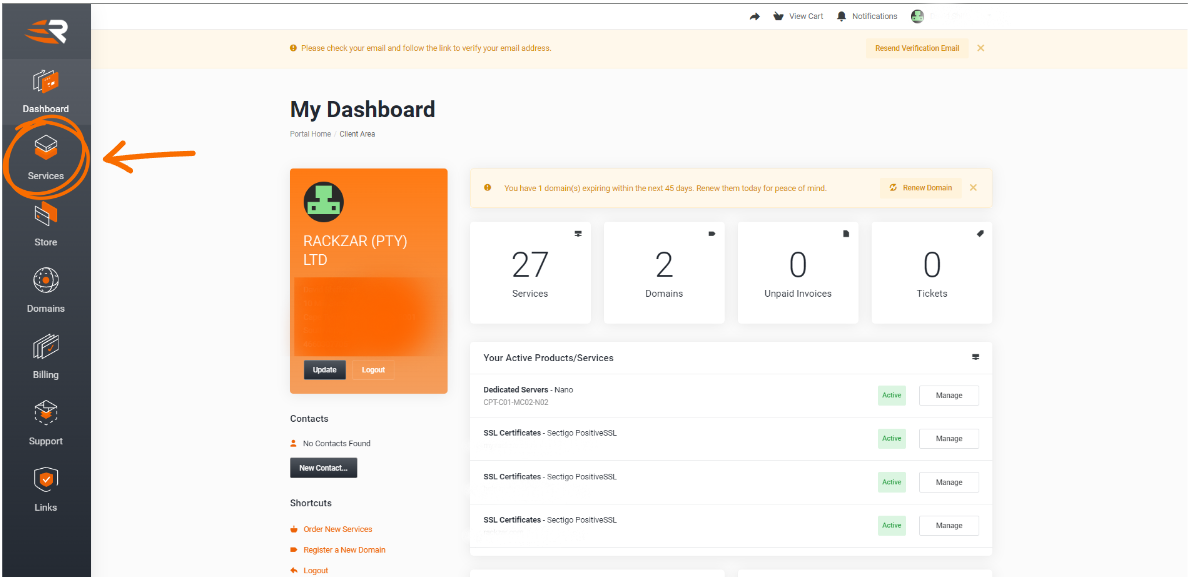
Step 2: Click on "Services" in the Left-hand Menu
Follow these steps to navigate to the "Services" section:
- After logging in to the client area, locate the left-hand menu.
- Within the menu, find and click on the "Services" option. It may be listed under a navigation section labeled "Dashboard" or similar.
Once clicked, you will be directed to the "Services" page, where you can manage your subscriptions and view details about your services.
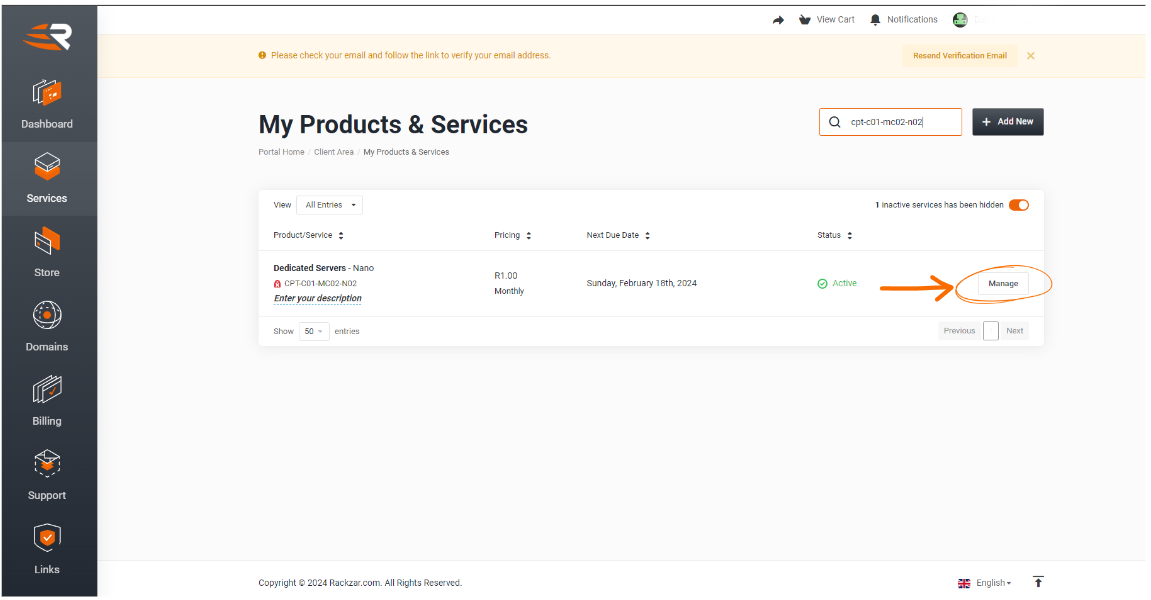
Step 3: Click on the "Manage" Button
To proceed with managing your service, follow these instructions:
- After accessing the "Services" page, locate the service you wish to manage.
- Within the row corresponding to the desired service, you will find a "Manage" button.
- Click on the "Manage" button associated with the service you want to modify.
Upon clicking the "Manage" button, you will be directed to the management interface for the selected service.
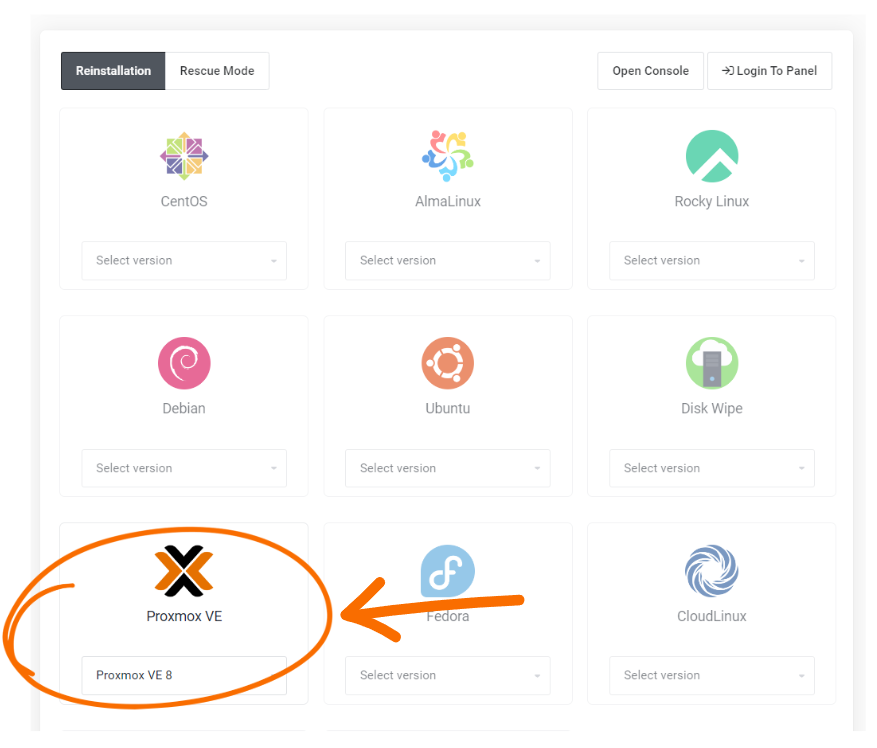
Step 4: Select the Preferred Proxmox VE Version
To choose your desired Proxmox VE version, follow these steps:
- Locate the Proxmox VE icon associated with your service. It should be displayed prominently on the management interface.
- Below the Proxmox VE icon, you will see a drop-down arrow symbol (∨) indicating a menu. Click on this arrow to reveal the available options.
- A list of Proxmox VE versions will appear. Select the version you prefer from the options provided.
By selecting your preferred Proxmox VE version, you can customize your service according to your requirements. Once you've made your selection, proceed with the next steps as needed.
Step 5: Set Root Password and Initiate Reinstallation
Follow these steps to set a root password and start the reinstallation process:
- Scroll down the management interface until you find the section labelled "Configure System."
- Within this section, locate the option titled "Set Root Password."
- Click on the field provided to set a password for the root user of your Proxmox VE system. Ensure to choose a strong and secure password.
- After setting the root password, navigate to the button labelled "Start Reinstallation" or similar. Click on it to initiate the reinstallation process.
Once clicked, the system will begin the reinstallation process with the newly configured settings. Please allow some time for the process to complete. Avoid interrupting the process until it finishes.

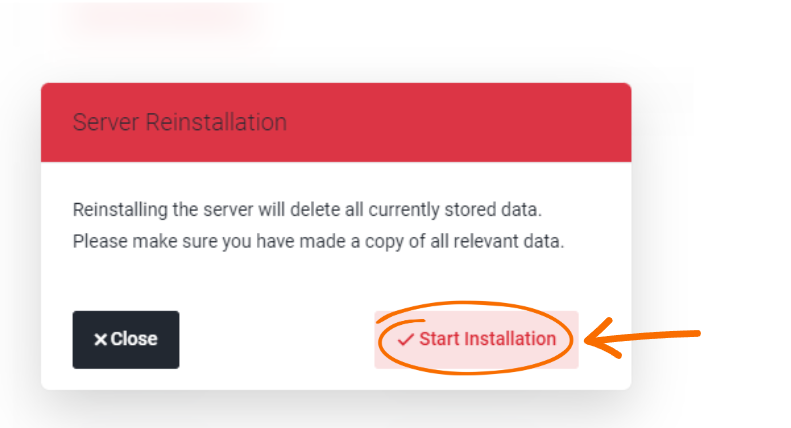
Step 6: Initiate Installation
Follow these instructions to begin the installation process:
- After setting the root password and starting the reinstallation process, locate the "Start Installation" button.
- Click on the "Start Installation" button to initiate the installation of Proxmox VE with the configured settings.
Once clicked, the installation process will commence. Depending on various factors such as system specifications and network conditions, the installation may take some time to complete. Please be patient and refrain from interrupting the process until it finishes successfully.
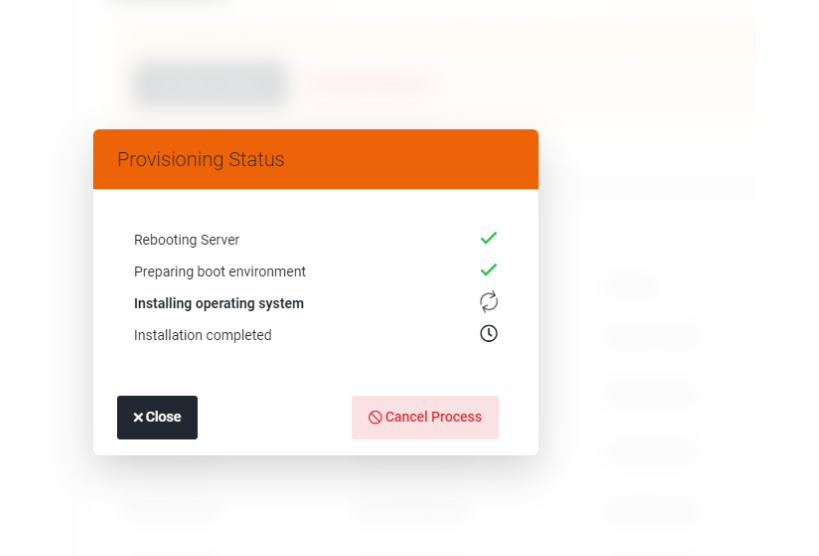
Step 7: Monitor Provisioning Status and Avoid Interruption
While the system is provisioning, it's essential to observe the status and avoid interrupting the process. Follow these guidelines:
- Keep an eye on the provisioning status displayed on the screen.
- During provisioning, refrain from clicking on the "Cancel Process" button or any other actions that may disrupt the provisioning.
- Please be aware that the provisioning process may take up to 30 minutes to complete. Factors such as system resources and network speed can affect the duration.
- Allow sufficient time for the provisioning to finish without interruption.
Note: Clicking on 'Cancel Process' while provisioning is in progress can disrupt the installation and may lead to an incomplete setup.