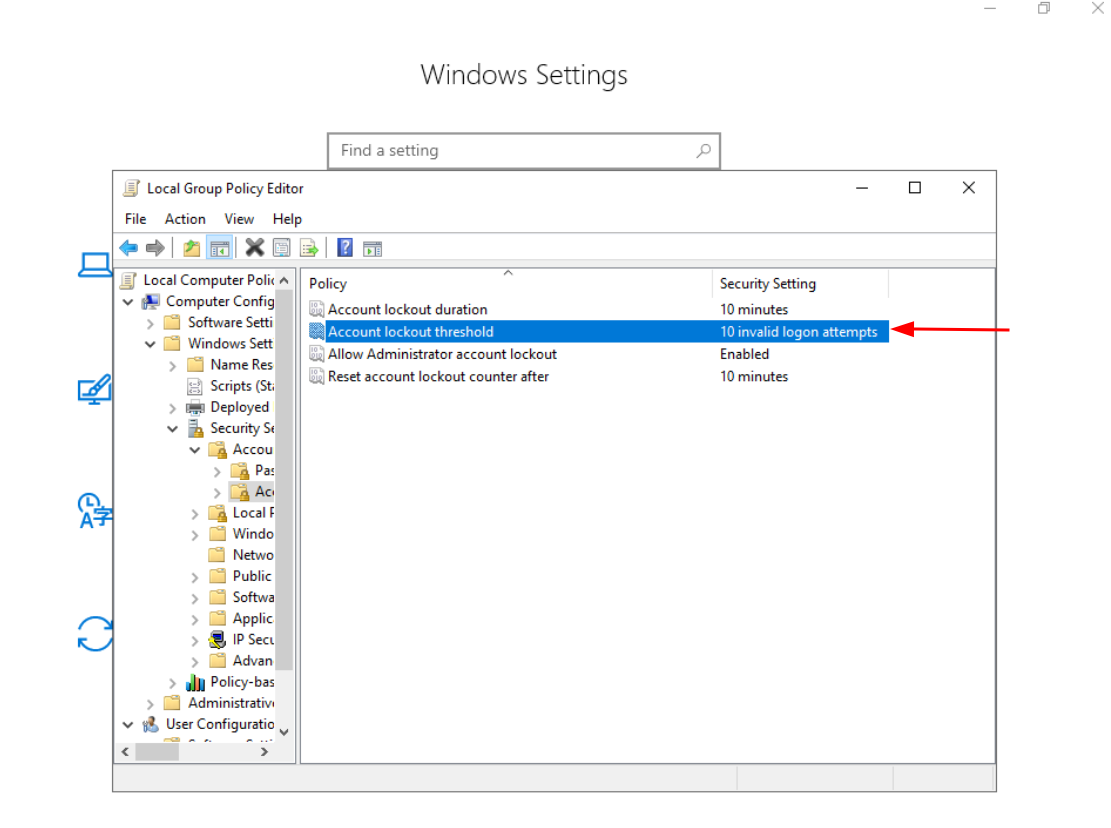
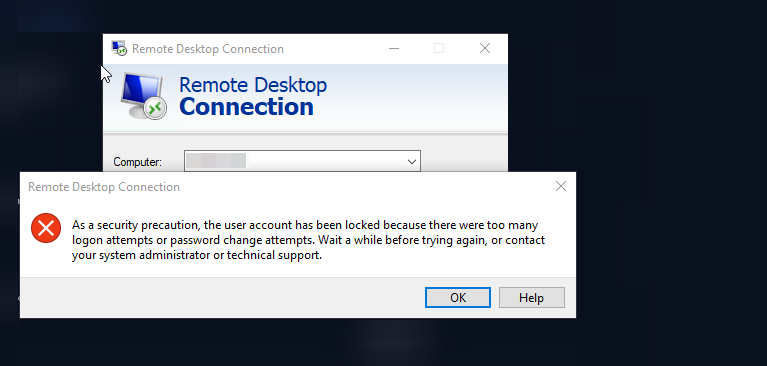
If you're experiencing a lockout error when logging in via Remote Desktop (RDP), it's due to your operating system's default lockout policy. This policy temporarily locks the account after several failed login attempts. You can either disable this policy or adjust the threshold for lockouts.
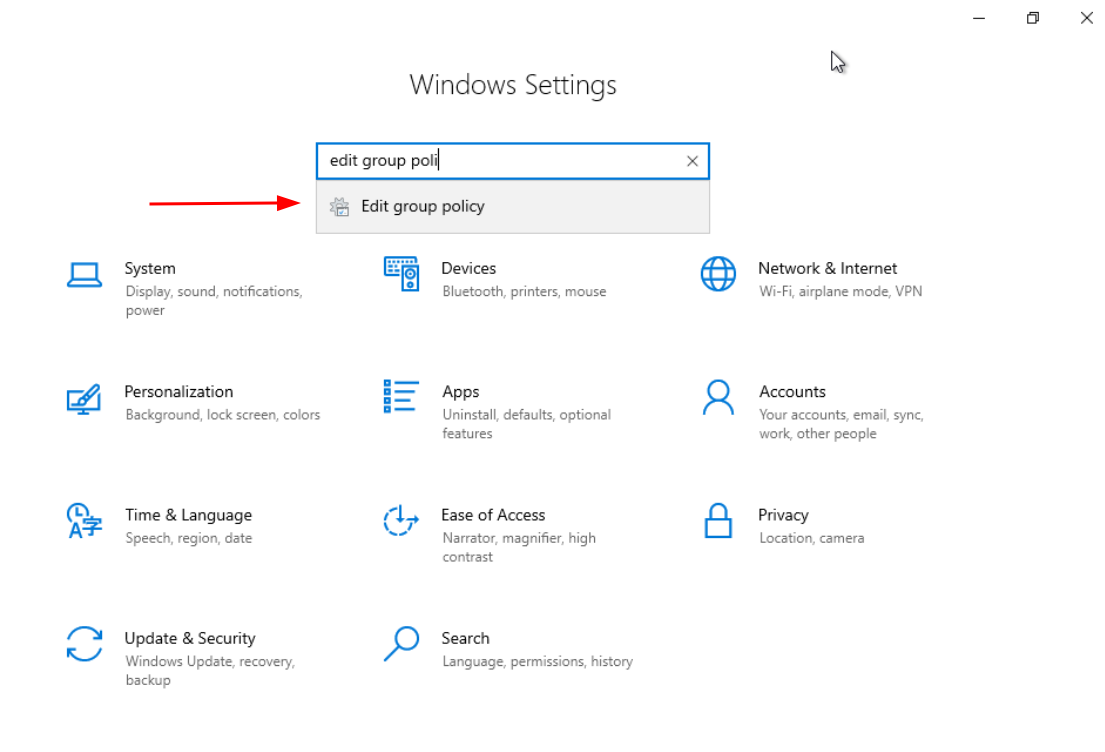
Step 1: Navigate to Group Policy Editor
- Open the Settings menu and access the Control Panel.
- Navigate to Group Policy Editor by typing
gpedit.msc into the search bar.
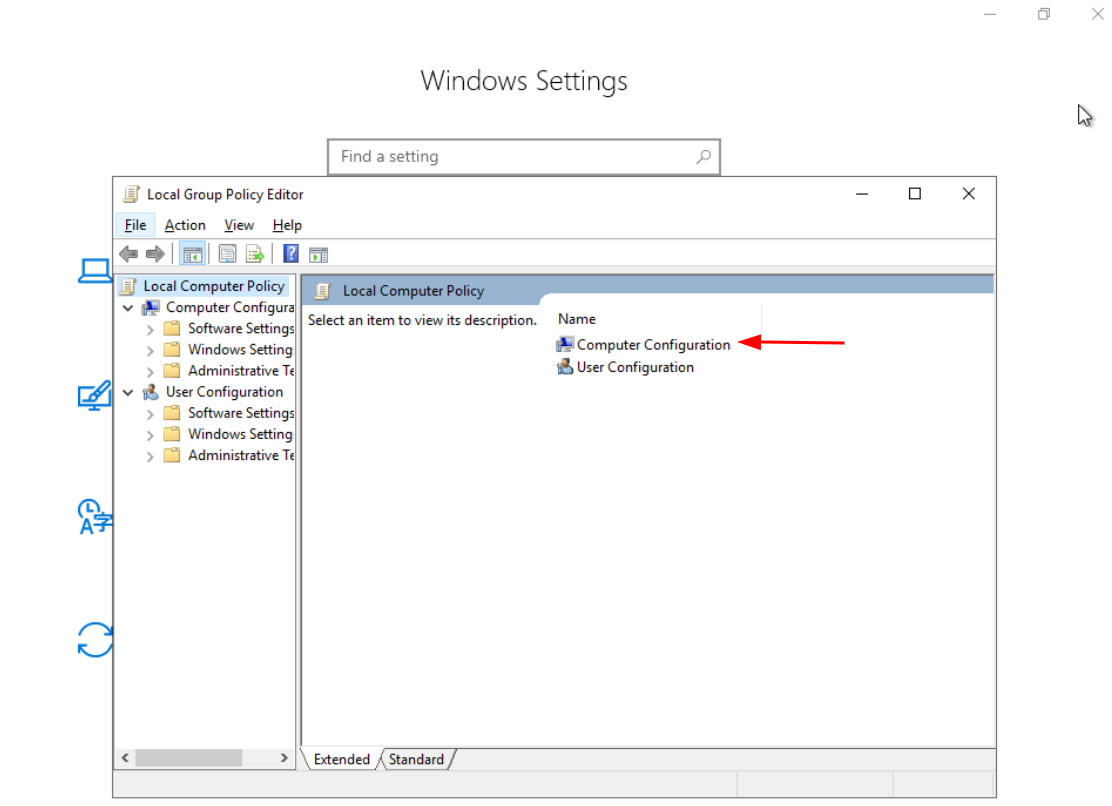
Step 2: Locate Computer Configuration
- Within Group Policy Editor, navigate to Computer Configuration.
- This area allows you to customise fundamental system settings, including security policies like account lockouts.
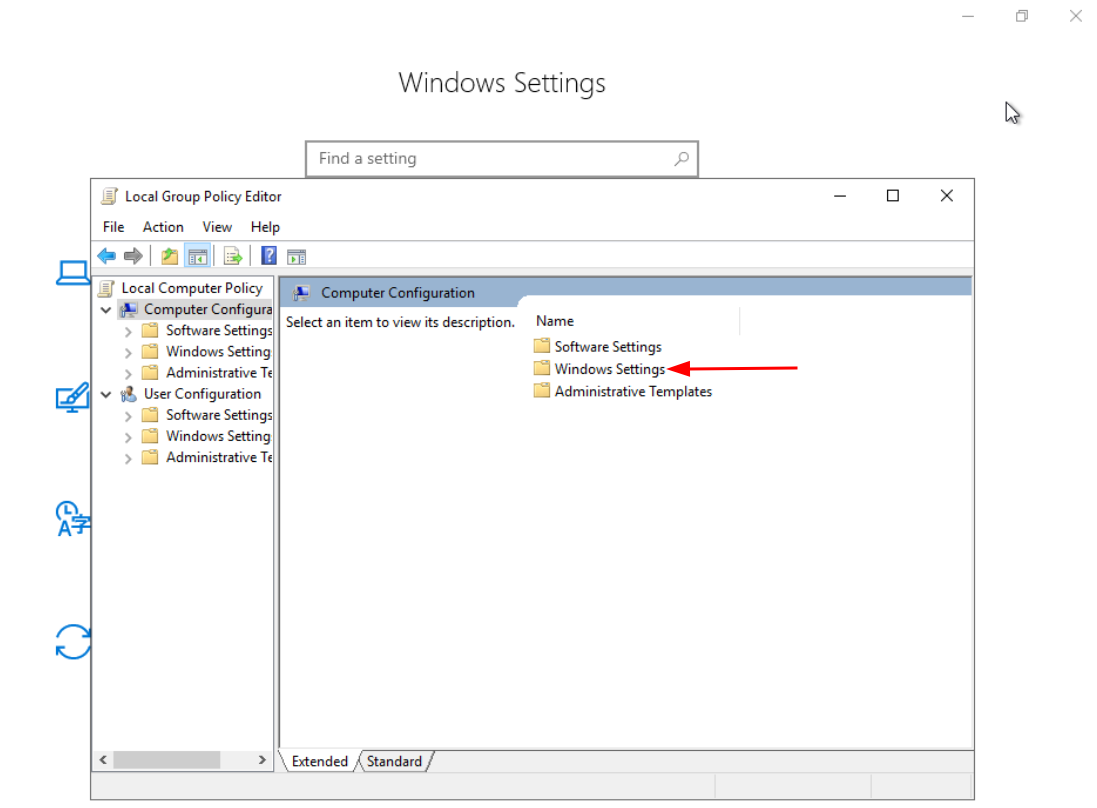
Step 3: Navigate to Windows Settings
- Within Computer Configuration, expand Windows Settings.
- This section allows you to fine-tune configurations specific to the operating system, including security and login attempt policies.
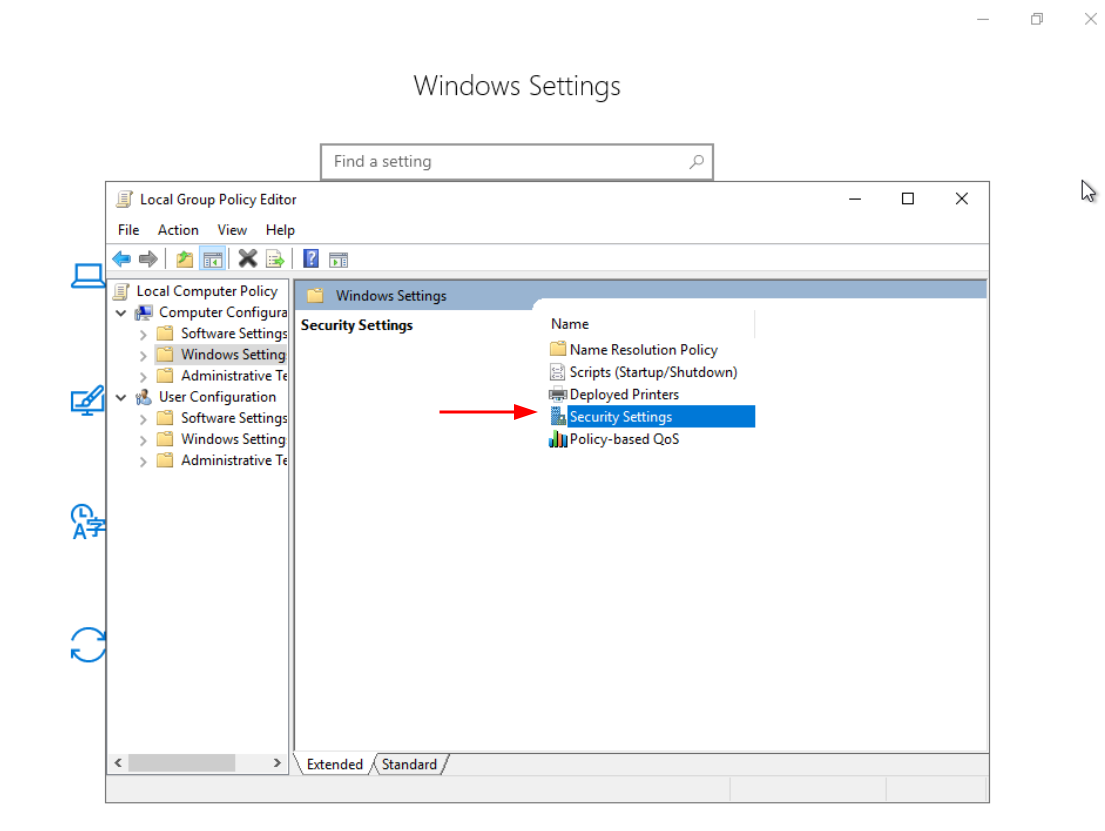
Step 4: Access Security Settings
- In Windows Settings, navigate to Security Settings.
- This area allows you to configure various security-related options, including policies that govern account lockouts and login attempts.
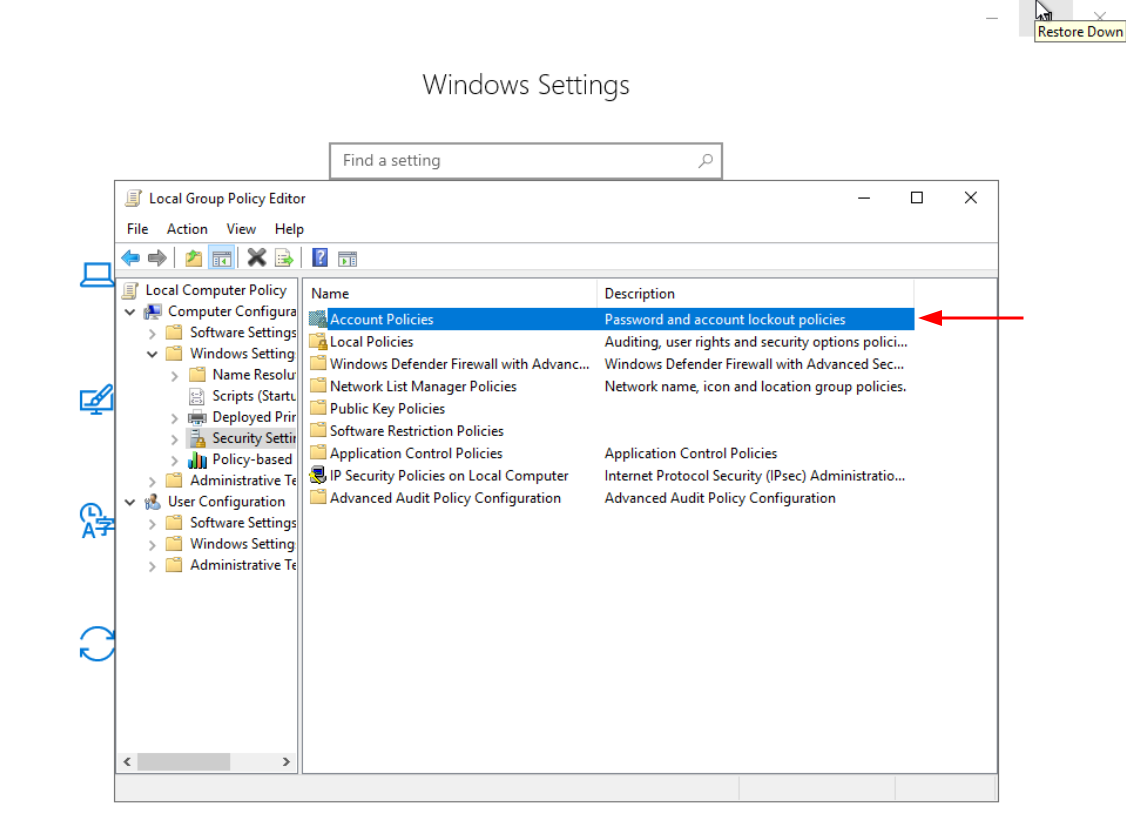
Step 5: Find Account Policies
- Navigate to Computer Configuration.
- Go to Windows Settings > Security Settings.
- Select Account Policies.
- Customize the rules governing user accounts (e.g., password or lockout policies).
Step 6: Explore the Account Lockout Policy
- Navigate to Account Policies within the Group Policy Editor.
- Click on Account Lockout Policy.
- Establish protocols for handling account lockouts, such as setting the lockout duration and the number of invalid login attempts before the lockout.
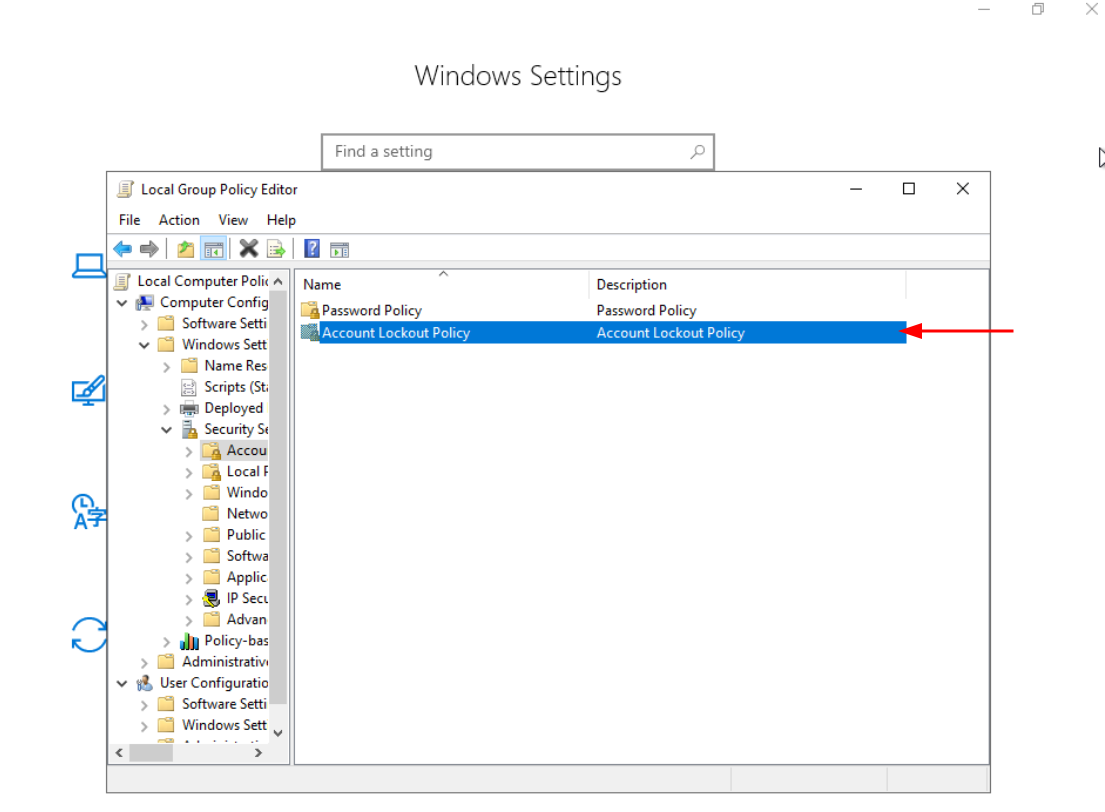
Step 7: Adjust Account Lockout Threshold
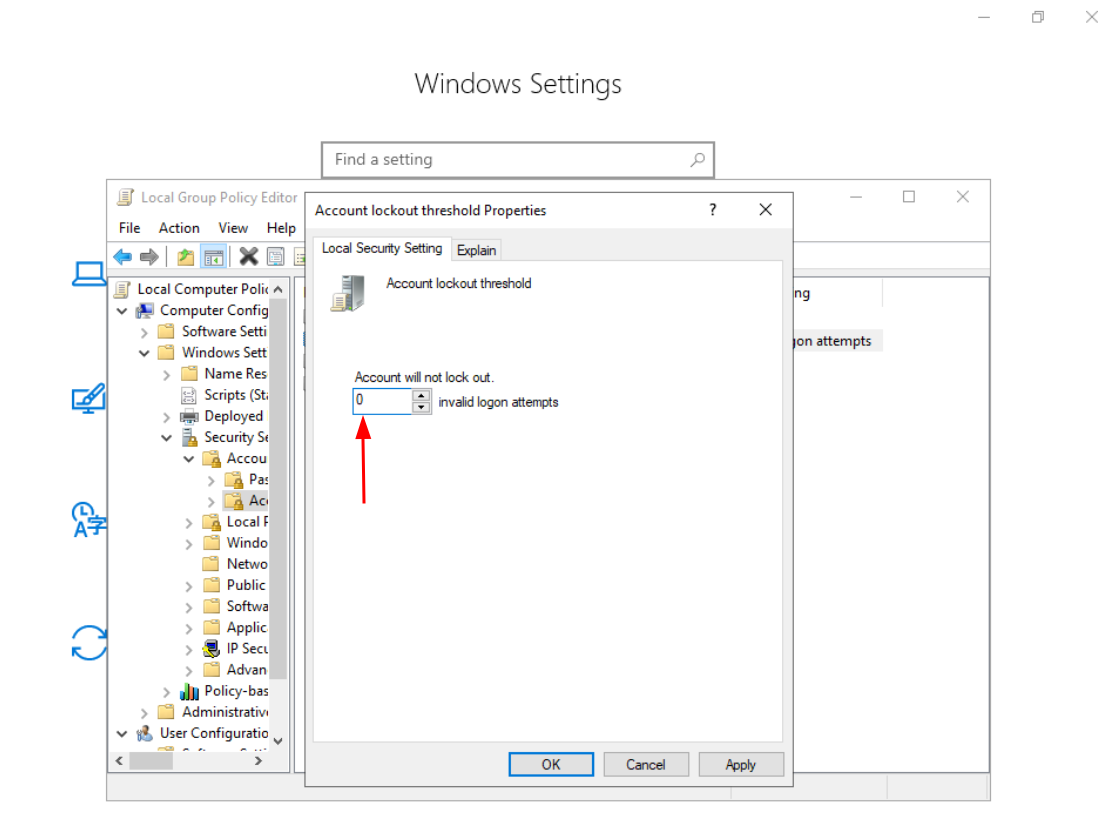
- In the Account Lockout Policy section, find Account Lockout Threshold.
- Double-click on it to open the settings.
- Set the number of invalid login attempts that trigger an account lockout.
- Consider the balance between security needs and user accessibility when determining the threshold.
