How to install from ISO on Your Dedicated Server
Please note - If you are performing a re-install of your Dedicated Server please use the following guide to wipe and clear the disk partitions before attempted the below steps.
How to Disk Wipe your dedicated Server Before Re-Install.
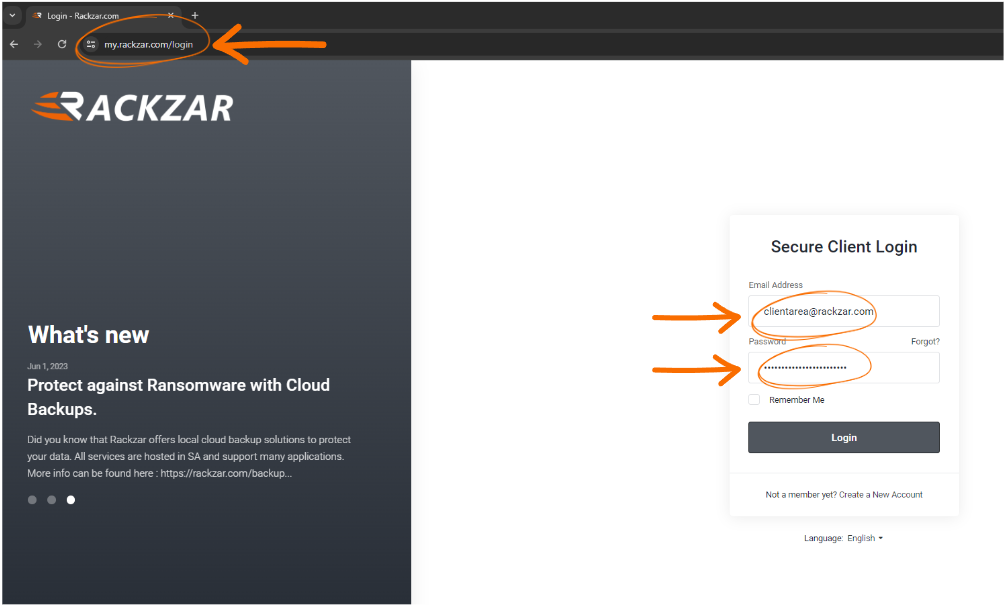
Step 1: Open Your Web Browser and Navigate to the Client Area URL
To access the client area, follow these steps:
- Launch your preferred web browser.
- In the address bar, type or copy-paste the following URL: https://my.rackzar.com/login
- Press "Enter" or "Return" on your keyboard to load the webpage.
You should now be directed to the login page of the client area.
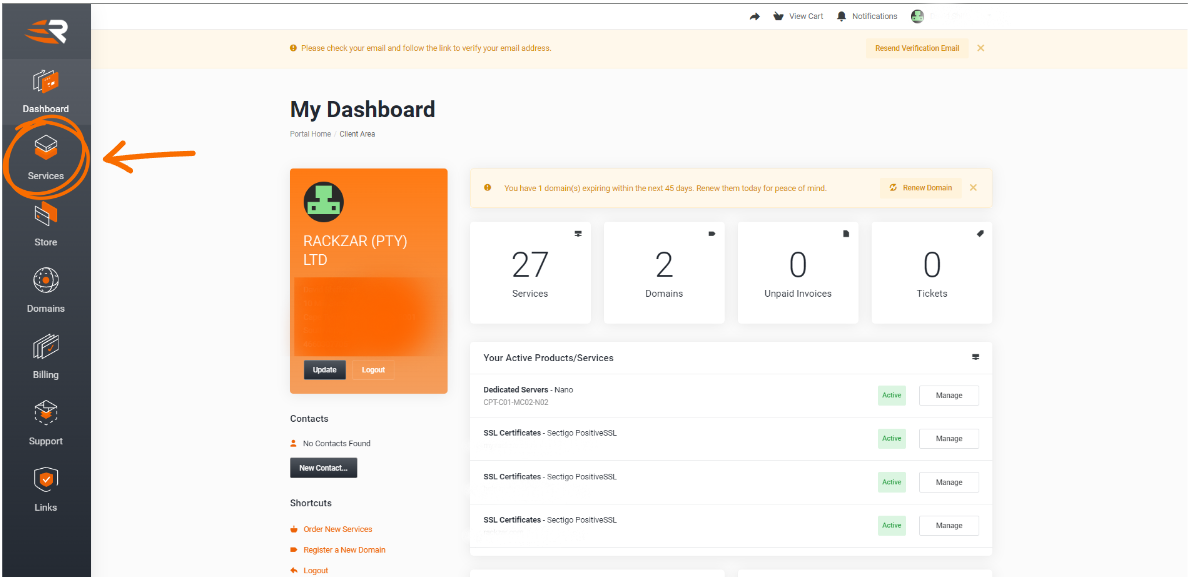
Step 2: Click on "Services" in the Left-hand Menu
Follow these steps to navigate to the "Services" section:
- After logging in to the client area, locate the left-hand menu.
- Within the menu, find and click on the "Services" option. It may be listed under a navigation section labeled "Dashboard" or similar.
Once clicked, you will be directed to the "Services" page, where you can manage your subscriptions and view details about your services.
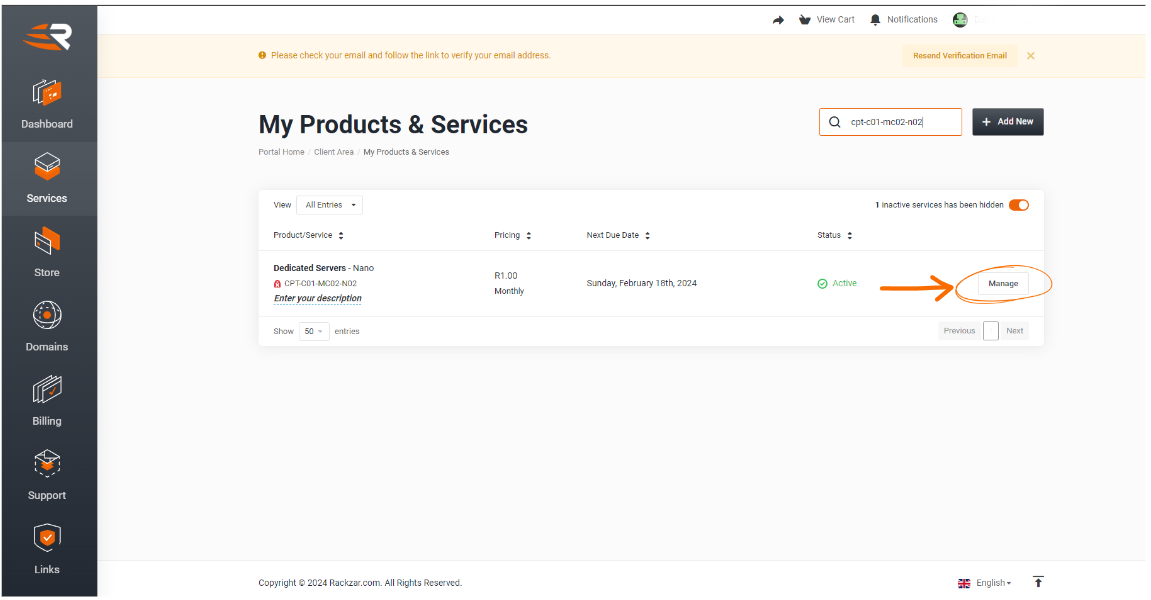
Step 3: Click on the "Manage" Button
To proceed with managing your service, follow these instructions:
- After accessing the "Services" page, locate the service you wish to manage.
- Within the row corresponding to the desired service, you will find a "Manage" button.
- Click on the "Manage" button associated with the service you want to modify.
Upon clicking the "Manage" button, you will be directed to the management interface for the selected service.
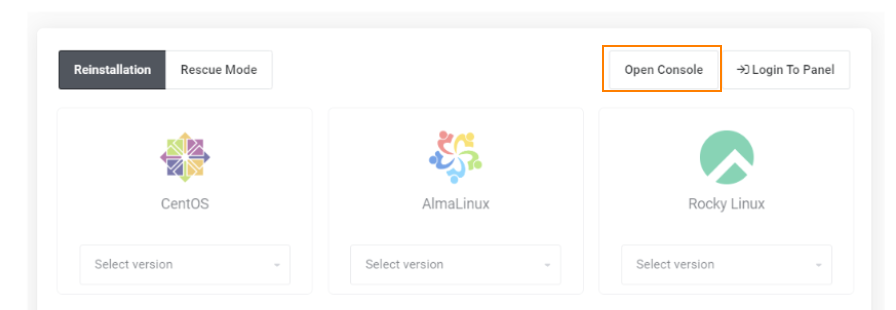
Step 4: Open Console
To choose your desired ISO follow these steps:
- Once the console screen has loaded, select from the menu bar " Virtual Media " and " Virtual Storage."
- After loading, select ISO from the drive type dropdown. Select "Open" and browse to your desired ISO from the folder.
- After making your selection click "plug in" and wait for 10 seconds for the ISO to show that is has been mounted to the virtual media.
The Virtual media has now been mounted to your server and is ready to use.
Reboot the server and using boot menu (F11) select the virtual CDROM which should have name starting with "ATEN"
Proceed to complete your install and repeat the steps to remove/unmount the ISO once completed.