
Follow the steps set out below to setup a VPN connection using Wireguard from a Mikrotik Client Router.
This guide assumes you have RouterOS version 7.6 or newer.
** You will need to have a wireguard VPN profile created with Rackzar or your VPN provider to follow this guide. **
- Create a VPN user if you have not done so already from the Rackzar client zone.
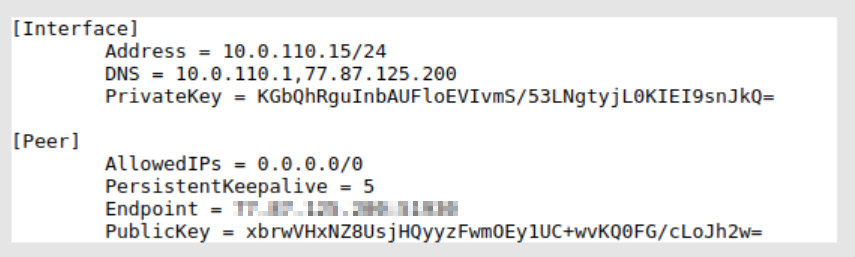
- Select " Management VPN account " and note the details listed under the " WireGuard configuration " heading which will appear similar to the below example.
You will need this information to continue.
- Login to Mikrotik via Winbox
Click on the menu item WireGuard In the window that opens, in the WireGuard tab, click the plus to add a new WireGuard interface.
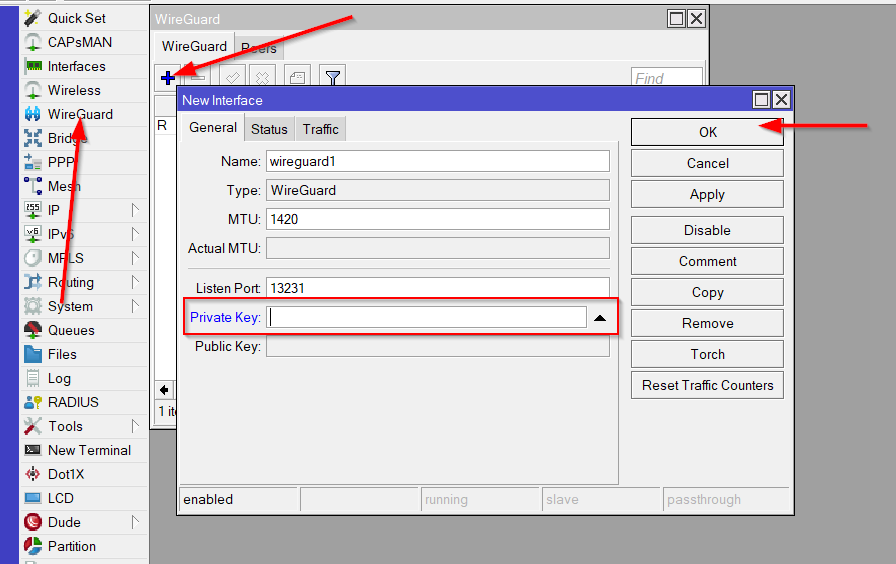
Copy the private key from the text configuration from the [Interface] section to the PrivateKey field in the WireGuard interface settings in Mikrotik
Click OK to create the interface.
- Create a new Wireguard Peer
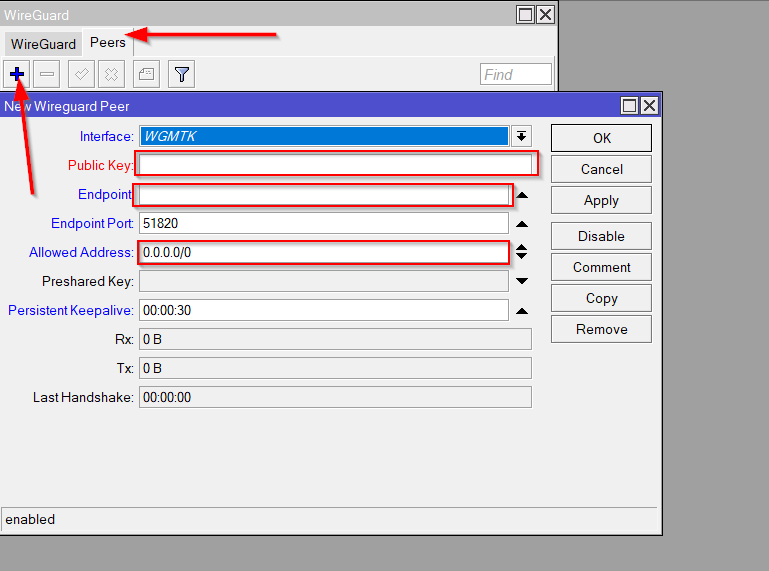
4.1 Select the peers tab.
4.2 Click plus to add a new peer.
Interface - Select the previously created WireGuard interface.
Public key - Copy the public key from the text configuration from the [Peer] section to the Public key field.
Endpoint - Copy the server address from the text configuration from the [Peer] section to the endpoint field.
Endpoint Port - Copy the server port from the text configuration from the [Peer] section to the Endpoint Port field.
Allowed Address - Copy AllowedIPs from the text configuration from the [Peer] section to the Allowed Address field.
Persistent Keepalive - Copy the PersistentKeepalive from the text configuration from the [Peer] section to the Persistent Keepalive field.
Click OK to create a peer
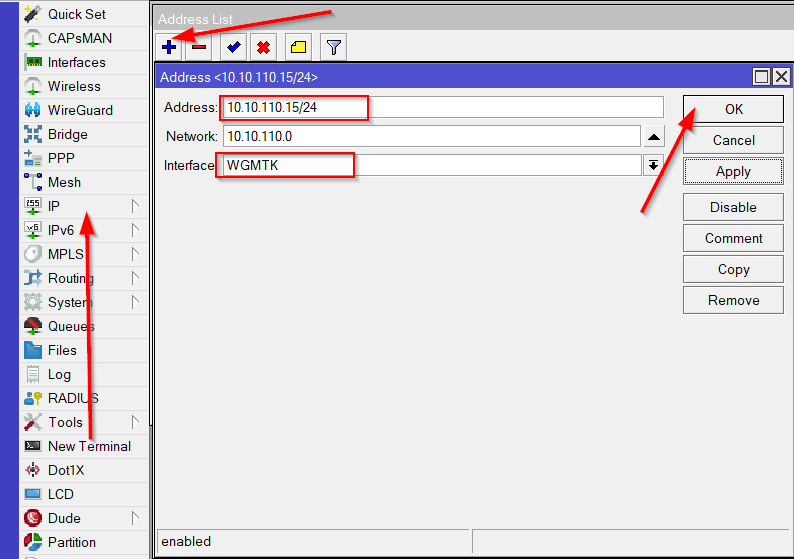
- The final setup is to create the IP address that will be used for the Wireguard Tunnel.
Select IP from the Menu then "Address"
Addresses - Copy the Address from the text configuration from the [Interface] section to the Address field
Interface - Select the previously created WireGuard interface
Press the OK button to confirm
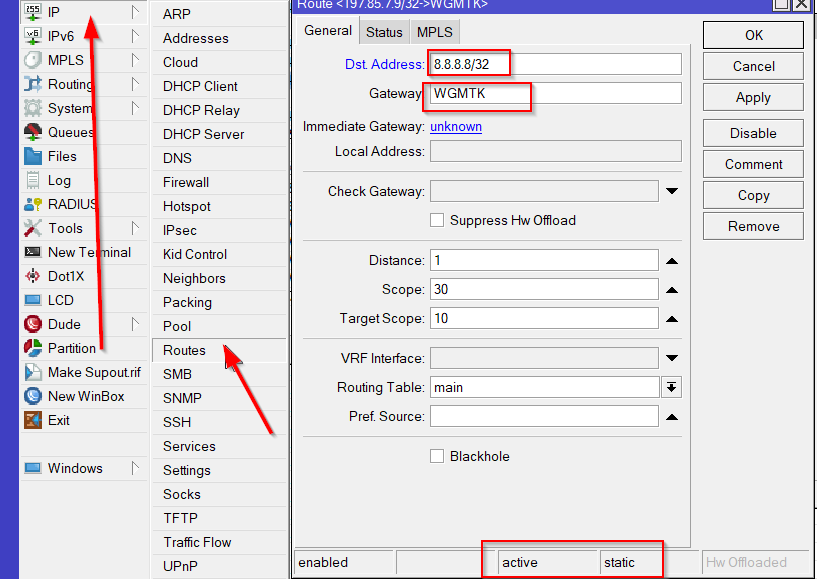
- At this point your Wireguard VPN should be connected however you will still need to add a static route to redirect our traffic over the VPN, in this example we are routing 8.8.8.8 over the newly created Wireguard Interface.
Select IP, Routes and Click the + Sign to add a new static route.
Once added you can use the traceroute within the Mikrotik to test if the traffic is leaving the VPN Wireguard Interface.
- You have now established a Wireguard client connection using Mikrotik.
Traffic will be routed over the tunnel.